Offline Updates
Offline Updates
An appliance without an internet connection cannot use the built-in update mechanism described under Software Updates. Such an appliance is updated by replacing its OS disk with the OS disk from a newer VM image, which you download once on a workstation that does have internet access.
This is an update, not a reinstall: you get exactly the same software version the online updater would have installed, and you keep everything you have configured. It is also the procedure to use for a system that is technically online but is not allowed to reach the outside world.
Why this works: the disk layout
The appliance is built from three separate virtual disks:
| Disk | Contents | Replaced during an offline update? |
|---|---|---|
| Disk 1 — OS | Operating system and the PrivateLAN application | Yes — this is the disk you swap |
| Disk 2 — LOGS | Log files | No — stays attached, untouched |
| Disk 3 — DATA | Database, configuration and PKI certificates | No — stays attached, untouched |
Everything you have set up — switches, VLANs, devices, users, certificates, settings and your license — lives on the DATA disk. Replacing the OS disk therefore replaces only the software. The first time the appliance boots from the new OS disk it automatically brings the database up to date, so the new software finds the schema it expects.
Replace the disk, not the virtual machine. Your license is bound to the virtual machine's own hardware identity, which does not change when a disk is swapped. If you import the downloaded image as a new virtual machine instead, it gets a new identity, your license no longer matches it, and you would first have to go through the VM replacement procedure described under Licenses.
Before you start
- Download the image for your hypervisor from the downloads page and verify the published SHA256 checksum of the archive before using it.
- Go straight to the newest version. Intermediate versions do not need to be installed one by one; every pending database change is applied on the first boot, however many versions you skip.
- Plan a short maintenance window. The appliance is offline while you swap the disk. Devices that are already authenticated on the network normally stay connected, but new 802.1x/RADIUS authentications fail until the appliance is back up.
- Keep the old OS disk. Do not delete it until the new version has proven itself — it is your way back.
- Check free space on the hypervisor for a second copy of the OS disk (roughly 17 GB) plus the checkpoint you will create.
Microsoft Hyper-V
The screenshots below were taken on a Dutch-language Windows. The English menu labels are used in the text, with the Dutch wording in brackets where the two differ.
1. Extract the downloaded image
Extract the downloaded archive on your workstation. Inside is a PrivateLAN folder containing a Virtual Hard Disks folder with the three disks of the new version:
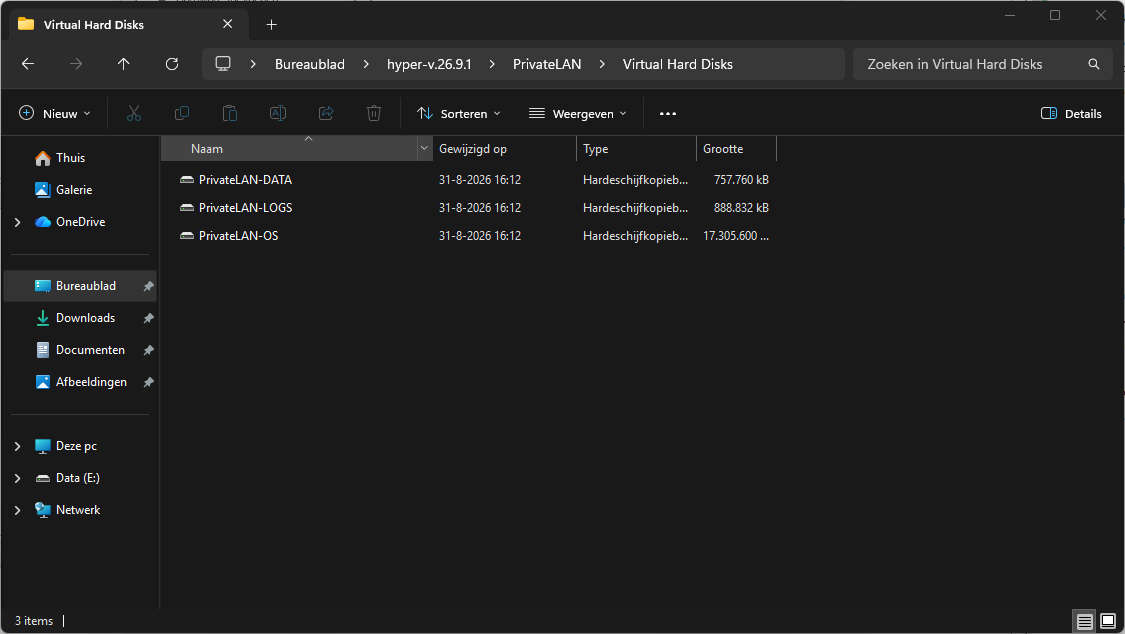
You only need PrivateLAN-OS — the largest of the three, around 17 GB. The DATA and LOGS disks in the download are empty starter disks; using them would throw away your configuration.
2. Find where your current VM keeps its disks
In Hyper-V Manager, right-click the PrivateLAN VM and choose Settings (Instellingen). Select the hard drive under the SCSI controller and read the full path of the current PrivateLAN-OS.vhdx. By default this is C:\ProgramData\Microsoft\Windows\Virtual Hard Disks. Open that folder in File Explorer:
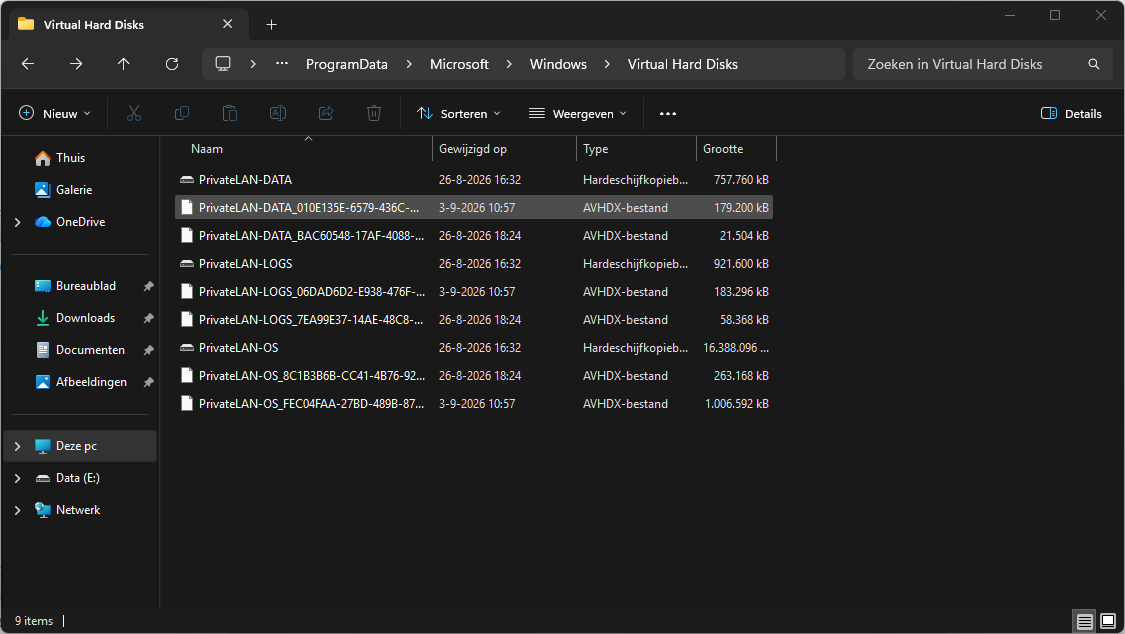
The .avhdx files you may see next to the disks belong to existing checkpoints. Leave them alone.
3. Rename the new OS disk
Rename the freshly extracted PrivateLAN-OS to include the version number, for example PrivateLAN-OS-v.26.9.1:
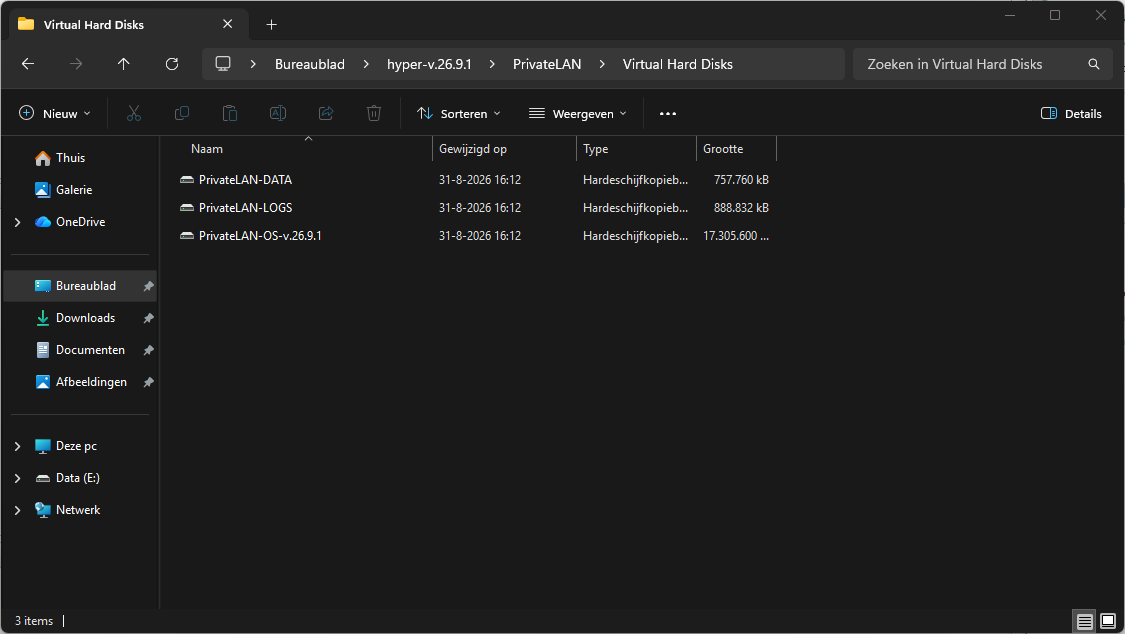
This is necessary because the new disk is about to be placed next to the existing PrivateLAN-OS.vhdx in the same folder, and it makes it immediately obvious afterwards which file holds which version.
4. Copy the new OS disk to the VM's disk folder
Copy the renamed file into the folder you identified in step 2, so the old and the new OS disk sit side by side:
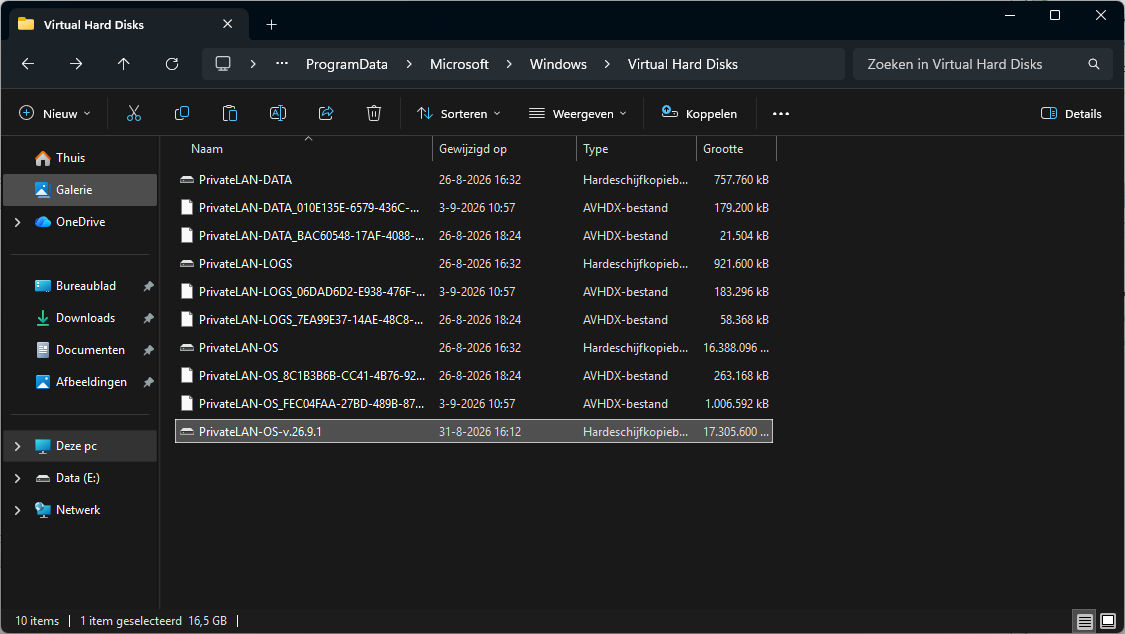
Copying roughly 17 GB takes a few minutes. Do this while the appliance is still running, so the actual downtime stays short.
5. Shut down the appliance
In Hyper-V Manager, select the VM and choose Shut Down (Afsluiten) — not Turn Off (Uitschakelen), which cuts the power without letting the system close down cleanly. Wait until the state is Off before continuing.
6. Point the VM at the new OS disk
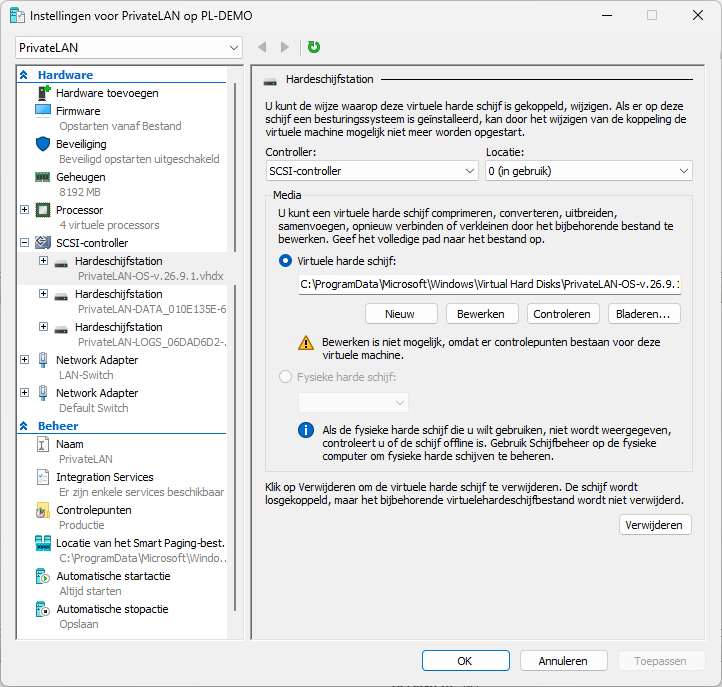
Open Settings again, select the hard drive holding PrivateLAN-OS.vhdx under the SCSI controller, and click Browse (Bladeren):
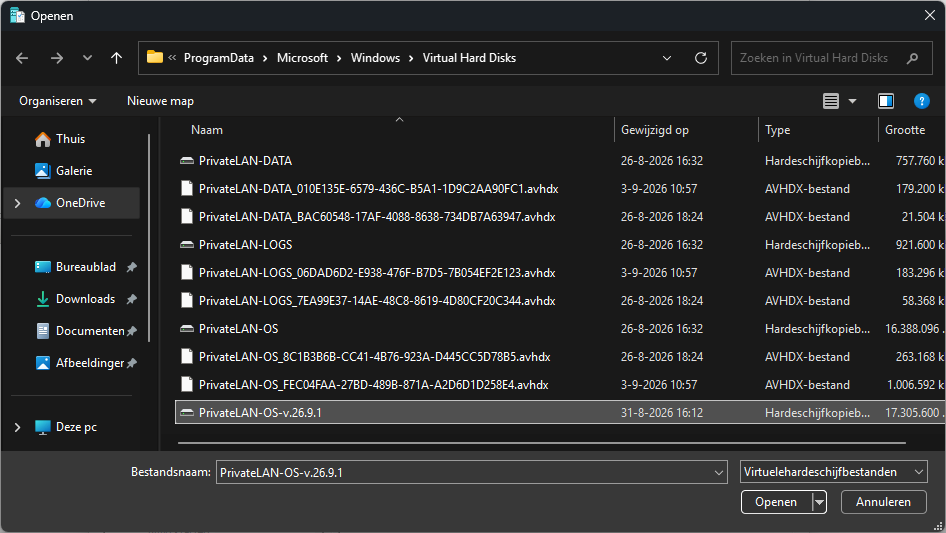
Select the version-named disk you copied in step 4 and click Open (Openen):
Leave the controller and location as they are, and do not touch the DATA and LOGS hard drives.
7. Apply, and let Hyper-V create a checkpoint
Click Apply (Toepassen). Because the VM has checkpoints, Hyper-V warns that continuing can lead to data loss and offers to create a checkpoint first:
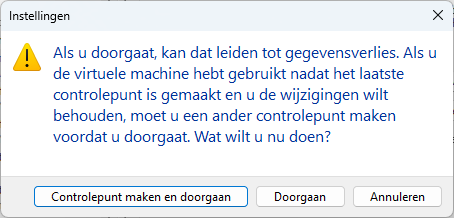
Choose Create Checkpoint and Continue (Controlepunt maken en doorgaan). This captures the current state before the swap, giving you a second way back on top of the old disk file itself. Then click OK to close the settings.
8. Start the VM and wait for the database upgrade
Start the VM and open the console. Wait until the console reports that applying the pending database changes has finished and the login prompt appears:
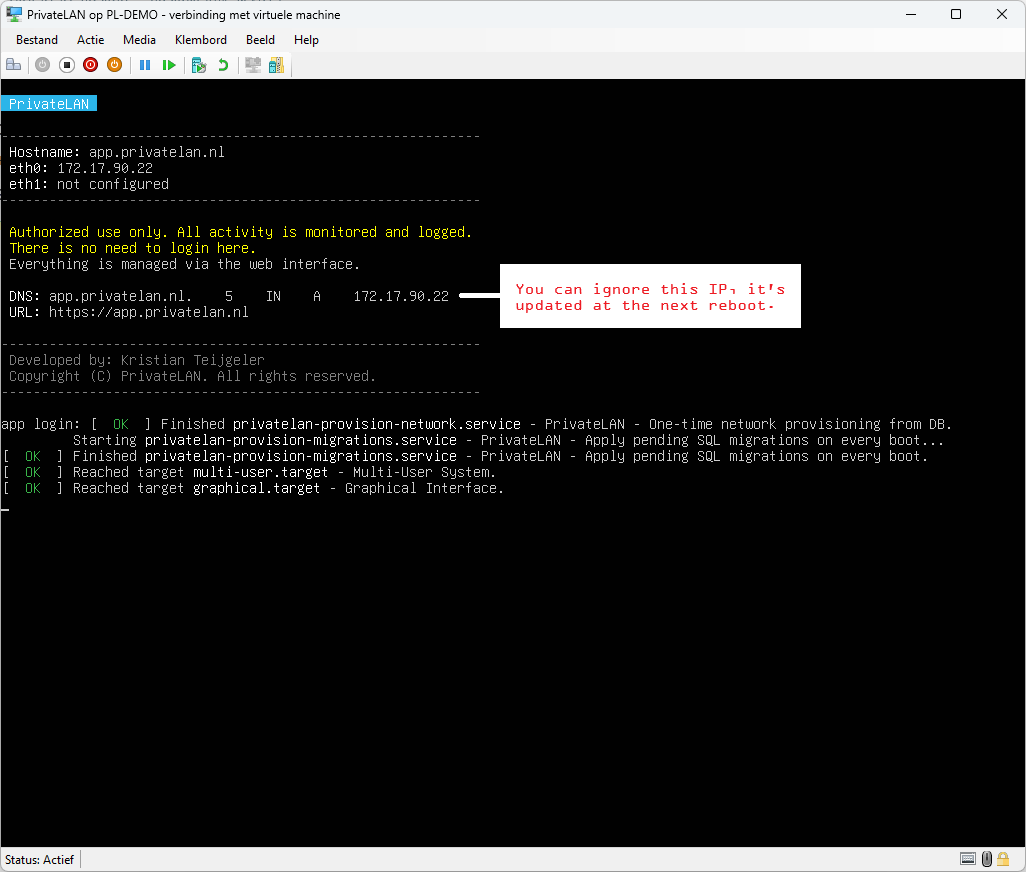
This usually takes well under a minute. Do not open the web interface before this is done — the new software is already running while the database is still being upgraded, so opening it too early can show an error or an "unavailable" page. That is temporary and harmless: wait for the console and reload.
Two things on that screen are worth knowing:
- The IP address in the banner can still be the one from the freshly downloaded image. Your own network settings are restored from the DATA disk during the same boot, and the banner catches up at the next reboot. The web interface is reachable at your own address as usual.
- There is no need to log in on the console. Everything is managed from the web interface.
9. Verify and take a fresh checkpoint
Open the web interface and log in as usual. Check the version number on the updates page — it should show the version you just installed — and confirm that your switches, devices and license are all still there.
Once you are satisfied, create a new checkpoint of the VM. That gives you a clean, known-good restore point on the new version, which is the one you will want if something goes wrong later.
Rolling back
If the appliance does not come up correctly, shut it down and point the hard drive back at the previous PrivateLAN-OS.vhdx (step 6, in reverse), or restore the checkpoint that was made in step 7.
The database keeps the upgrade that was applied at the first boot. That is deliberate and safe: database changes within a release are always made so that the previous version keeps working with them. If you need to go back more than one version, contact PrivateLAN support first.
Cleaning up
Once the new version has run without problems for a while:
- Delete the old
PrivateLAN-OS.vhdxfrom the VM's disk folder to reclaim the space. - Remove checkpoints you no longer need. Checkpoints keep growing as
.avhdxfiles and slow the VM down if you let them pile up.
VMware ESXi and XCP-ng
The principle is identical on every hypervisor: attach the new OS disk in place of the old one and leave the DATA and LOGS disks exactly where they are. Step-by-step instructions with screenshots for VMware ESXi/vSphere and XCP-ng will be added here. In the meantime, contact PrivateLAN support and we will guide you through it.
Security updates and support term
PrivateLAN security updates are available free of charge for at least five years per release. This applies to both online updates and offline VM images, even without an active SLA. Support remains available for older versions. New bug fixes and security fixes are developed and tested against the current supported release, so an update may be required first to reproduce or resolve an issue on an older version. The current release and any available workaround are listed on the support and downloads page.
